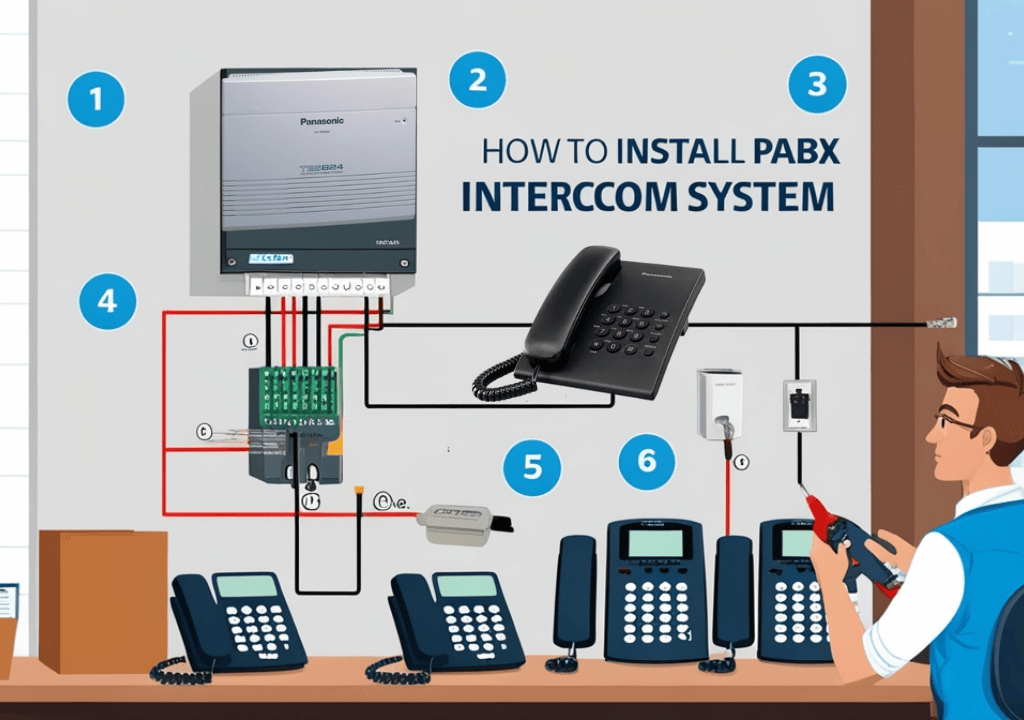
How to Connect a PABX Intercom in Office/Home by Yourself: The Complete Guide
Here’s the uncomfortable truth about PABX installation: most “guides” online treat you like either a complete novice or a certified telecommunications engineer. There’s nothing in between.
The result? Business owners pay 2,000-5,000 for installations they could handle themselves, while DIY enthusiasts give up halfway through because the instructions assume they know what a “trunk line” is.
After installing PABX systems in over 200 offices and homes—from 3-person startups to 50-employee call centers—I’ve learned that successful DIY installation isn’t about technical expertise. It’s about having a systematic approach that accounts for real-world complications.
This guide bridges that gap. You’ll walk away knowing exactly how to install PABX intercom systems yourself, when to call professionals, and how to avoid the expensive mistakes that derail most DIY projects.
What you’ll learn in pabx intercom installation:
- Complete office and home PABX installation processes
- Equipment selection and compatibility requirements
- Troubleshooting the 7 most common installation failures
- Cost analysis: when DIY saves money vs. when it doesn’t
- Professional installation standards you can achieve at home
Understanding PABX System Installation : More Than Just “Office Phones”
Before touching any wires, you need to understand what you’re actually building.
A PABX (Private Automatic Branch Exchange) isn’t just a phone system—it’s a complete communication infrastructure. Think of it as the nervous system of your office or home, routing calls, managing extensions, and enabling features like call forwarding, voicemail, and intercom functionality.
The Three Critical Components
1. Central Processing Unit (CPU/Main Unit) This is your system’s brain. Modern PABX units like those in Telecare System’s enterprise line can handle 8-200 extensions depending on your needs. The CPU manages call routing, stores programming, and interfaces with external phone lines.
2. Extension Stations These are your individual phones, intercoms, or communication endpoints. Each station gets a unique extension number and specific feature access based on your programming.
3. Trunk Lines Your connection to the outside world—traditional phone lines, VoIP connections, or cellular gateways. This is where most DIY installations fail because trunk configuration requires precision.
Office vs. Home: Different Beasts Entirely
Here’s where most guides go wrong—they treat office and home installations identically. They’re not.
Office installations prioritize reliability, scalability, and professional features. You need redundancy, call recording capabilities, and the ability to handle peak call volumes without dropping connections.
Home installations focus on convenience, integration with existing systems, and cost-effectiveness. You might want intercom functionality between rooms, integration with smart home systems, or simply a better way to manage family communications.
The equipment, wiring approaches, and programming differ significantly. This guide covers both scenarios with the specific considerations each requires.
Pre-Installation Planning: The Make-or-Break Phase
Every successful PABX installation starts with meticulous planning. Skip this phase, and you’ll spend twice as much time fixing problems later.
Site Assessment: What Most Guides Miss
Electrical Infrastructure Audit Your PABX system needs clean, consistent power. I’ve seen 3,000 systems destroyed by dirty power that could have been prevented with a 50 surge protector. Check your electrical panel—if you’re running the system off the same circuit as heavy machinery or HVAC equipment, you need dedicated power.
Network Integration Requirements Modern PABX systems integrate with existing network infrastructure. Map your current network topology:
- Available network ports near the main unit location
- Internet bandwidth allocation (VoIP calls consume 100kbps per concurrent call)
- Network security considerations (many PABX systems require specific port configurations)
Physical Space Requirements The main unit needs climate-controlled space with ventilation. I’ve seen systems fail prematurely because they were installed in un-airconditioned closets or near heat sources. Plan for:
- Main unit housing (typically 19″ rack-mountable)
- Cable management and future expansion
- Access for maintenance and programming
Extension Planning: Avoiding the Expansion Trap
This is where DIY installations often fail long-term. You install for current needs, then face expensive rewiring when you grow.
The 50% Rule Whatever extension count you think you need, buy a system that handles 50% more. If you need 8 extensions today, get a system that handles 12-16. The incremental cost upfront is far less than upgrading the main unit later.
Zone-Based Planning Group extensions by physical location and usage patterns:
- Executive/management stations (require full feature access)
- General office stations (standard calling features)
- Reception/lobby stations (may need special programming for call routing)
- Specialized locations (conference rooms, security stations)
This approach simplifies wiring, programming, and future maintenance.
Equipment Selection: Beyond Price Comparisons
Compatibility Matrix Not all PABX equipment works together seamlessly. Create a compatibility matrix before purchasing:
- Main unit capabilities and expansion options
- Extension station feature requirements
- Trunk line interface types (analog, digital, VoIP)
- Integration requirements (call recording, CRM systems, etc.)
Telecare System’s equipment selection tools can help create these matrices, ensuring all components work together from day one.
Future-Proofing Considerations Technology changes fast. Your installation should adapt:
- VoIP capability (even if you’re starting with analog lines)
- Mobile integration options
- Cloud-based management features
- Scalability without complete system replacement
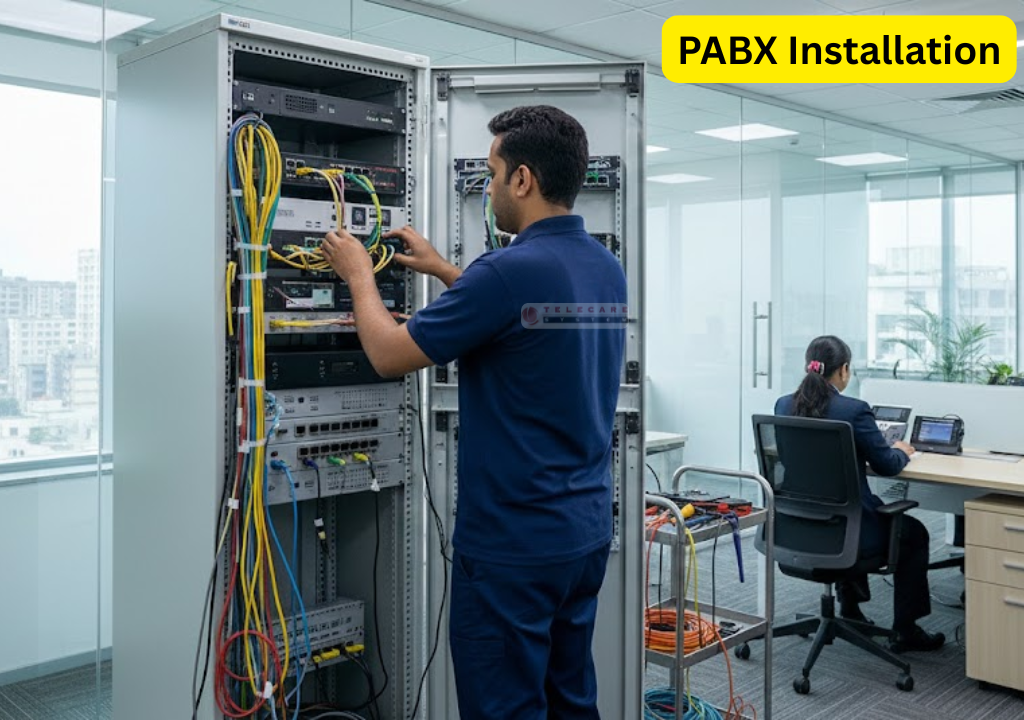
Office PABX Installation: Step-by-Step Process
Office installations demand professional-grade results. Here’s the systematic approach that ensures reliability and scalability.
Phase 1: Main Unit Installation
Location Selection Your main unit location determines installation success. Choose a location that provides:
- Climate control (65-75°F, low humidity)
- Clean electrical power with dedicated circuits
- Network connectivity with adequate bandwidth
- Physical security and access control
- Room for cable management and future expansion
Power Infrastructure Install dedicated power with proper grounding. The main unit should connect to:
- Dedicated 20-amp circuit (not shared with other equipment)
- High-quality surge protection (look for units with >1000 joule ratings)
- Uninterruptible power supply (UPS) for system reliability
- Proper electrical grounding to building ground system
Initial Configuration Before connecting any extensions, verify main unit operation:
- Power up with factory defaults
- Access programming interface (typically through connected computer or web browser)
- Verify system information (firmware version, available extensions, etc.)
- Test trunk line connectivity if external lines are connected
Phase 2: Extension Wiring and Installation
Cable Requirements Office-grade installations require proper cabling:
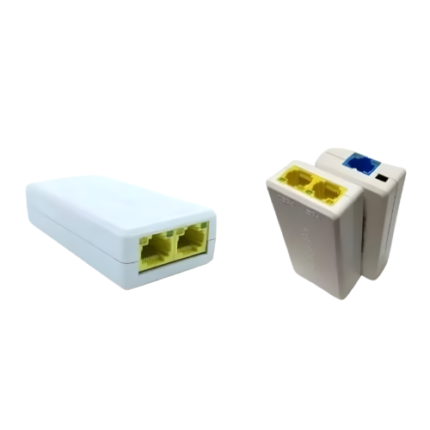
- Category 5e or Category 6 cable for digital extensions
- 4-conductor cable minimum (6 or 8 conductor recommended for feature phones)
- Home-run wiring from each extension location to main unit
- Proper cable labeling and documentation
Extension Installation Process
Step 1: Cable Routing Plan cable routes that avoid interference and physical damage:
- Avoid running parallel to electrical cables for extended distances
- Use proper cable management in ceiling spaces and wall cavities
- Leave service loops at both ends for future maintenance
- Install cables in protective conduit where required by code
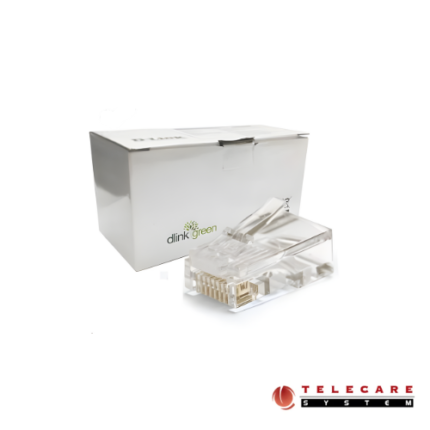
Step 2: Termination and Connection Proper termination ensures reliable operation:
- Strip cable jackets carefully to avoid damaging internal conductors
- Follow manufacturer’s wiring diagrams exactly (pin assignments matter)
- Use proper termination blocks or connectors
- Test each cable with appropriate test equipment before connection
Step 3: Extension Programming Each extension requires specific programming for your office needs:
- Extension number assignment
- Feature access level (depends on user requirements)
- Call routing and forwarding options
- Voicemail and personal settings
Phase 3: Trunk Line Integration
Analog Trunk Configuration Traditional phone line integration:
- Connect incoming lines to designated trunk ports on main unit
- Program line settings (dial tone detection, ring patterns, etc.)
- Configure outbound dialing rules and restrictions
- Test inbound and outbound calling functionality
VoIP Trunk Setup Internet-based calling integration:
- Configure network settings (IP address, subnet mask, gateway)
- Enter VoIP provider settings (SIP server, authentication credentials)
- Program codec preferences and quality settings
- Test call quality and adjust settings as needed
Hybrid Configurations Many offices benefit from both analog and VoIP trunks:
- Analog lines for reliability and emergency calling
- VoIP lines for cost savings on long-distance calls
- Automatic failover between trunk types
- Load balancing for high call volumes
Phase 4: System Programming and Feature Setup
Call Routing Programming Design call flow that matches your business processes:
- Auto-attendant setup and greeting recording
- Department-specific call routing
- After-hours call handling
- Emergency and priority call routing
User Feature Configuration Program features that enhance productivity:
- Speed dial numbers for frequently called contacts
- Call forwarding rules for mobile integration
- Conference calling capabilities
- Call recording settings (where legally permitted)
System Maintenance Settings Configure settings that ensure long-term reliability:
- Automatic backup of system programming
- Monitoring and alert settings
- Usage reporting and analysis features
- Security settings and access controls
Home PABX Installation: Residential-Specific Considerations
Home installations prioritize convenience, family features, and integration with existing home systems. The approach differs significantly from office installations.
Planning for Residential Use as example if you choose panasonic pabx installation
Family Communication Patterns Home PABX systems serve different needs:
- Intercom functionality between rooms
- Integration with doorbell and security systems
- Mobile phone integration for seamless indoor/outdoor communication
- Guest access and privacy considerations
Space and Aesthetic Considerations Home installations must blend with residential decor:
- Concealed wiring wherever possible
- Extension stations that complement home decor
- Quiet operation (no fan noise in bedrooms or living areas)
- Integration with home automation systems
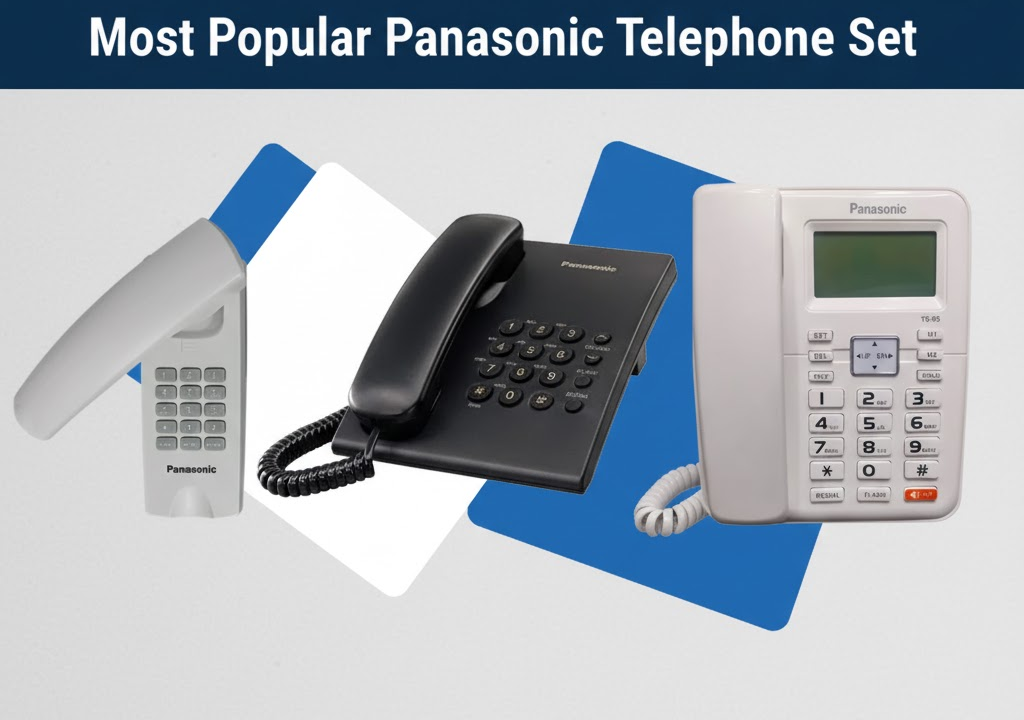
Some Popular Brands
Simplified Installation Process
Main Unit Placement Home installations offer more flexibility:
- Utility rooms, basements, or dedicated closets work well
- Less stringent power requirements (standard household circuits often sufficient)
- Integration with home network equipment
- Consideration for family member access to system programming
Extension Distribution Strategy Plan extension locations based on family usage:
- Master bedroom (full-feature station for household management)
- Kitchen (hands-free operation for safety)
- Family room (integration with entertainment systems)
- Children’s rooms (basic intercom functionality with appropriate restrictions)
- Outdoor areas (weather-resistant stations for pool/patio areas)
Wiring Approaches Home installations can use simplified wiring:
- Existing telephone wiring may be usable with modifications
- Wireless extension options for difficult-to-wire locations
- Powerline communication systems for certain applications
- Integration with structured wiring systems in newer homes
Home-Specific Features
Integration with Smart Home Systems Modern home PABX systems integrate with:
- Home automation platforms (lighting, HVAC, security)
- Voice assistants (Alexa, Google Assistant integration)
- Mobile apps for remote system management
- Integration with video doorbell and security camera systems
Family-Friendly Programming Configure features that work for residential use:
- Simple extension numbering (room names instead of numbers)
- Restricted dialing for children’s extensions
- Quiet hours programming for nighttime operation
- Integration with family calendars and scheduling systems
Troubleshooting: The 7 Most Common Installation Failures
After hundreds of installations, these are the problems that stop DIY projects cold. Here’s how to diagnose and fix each one.
1. No Dial Tone on Extensions
Symptoms: Extensions show power but no dial tone when handset is lifted.
Root Causes:
- Incorrect wiring at extension or main unit
- Programming errors in extension configuration
- Defective extension station or main unit port
Diagnostic Steps:
- Verify extension cable continuity with multimeter
- Check wiring configuration against manufacturer diagrams
- Test extension station with known good port
- Review extension programming for correct settings
Solution Process: Most often, this is a wiring polarity issue. Extension stations require specific wire pairs for tip and ring connections. Swap the connections and test—90% of dial tone problems resolve immediately.
2. One-Way Audio or No Audio
Symptoms: Calls connect but audio only works in one direction or not at all.
Root Causes:
- Audio path configuration errors
- Network issues (for VoIP systems)
- Impedance mismatches
- Codec compatibility problems
Diagnostic Approach:
- Test with multiple extension combinations
- Check network configuration for VoIP systems
- Review audio codec settings
- Test with external calls vs. internal calls
Resolution: This usually indicates network configuration issues in VoIP systems. Check firewall settings, ensure proper port forwarding, and verify bandwidth availability. For analog systems, check cable quality and connections.
3. System Doesn’t Answer Incoming Calls
Symptoms: External calls ring but system doesn’t respond or route calls incorrectly.
Troubleshooting Logic:
- Verify trunk line configuration and programming
- Check incoming call routing rules
- Test trunk lines with standard telephone
- Review auto-attendant programming
Fix Strategy: Usually caused by incorrect trunk line programming. Verify line polarity, ring detection settings, and call routing rules. Test each trunk line individually to isolate the problem.
4. Extensions Can’t Make Outbound Calls
Symptoms: Internal calls work fine, but outbound calls fail or don’t connect.
Common Causes:
- Outbound dialing restrictions
- Trunk line access programming
- Carrier-specific dialing requirements
- Line seizure settings
Resolution Process: Check extension class of service settings—many systems default to restricted outbound access. Verify dialing patterns match your phone service requirements (9 for outside line, etc.).
5. Intermittent System Failures
Symptoms: System works sometimes but fails unpredictably.
Investigation Method:
- Monitor power quality and stability
- Check for electromagnetic interference sources
- Review system logs for error patterns
- Test during different times/conditions
Typical Solutions: Power quality issues cause most intermittent failures. Install proper power conditioning and verify electrical grounding. Check for interference from other electronic equipment.
6. Poor Call Quality or Audio Issues
Symptoms: Static, echo, volume problems, or distorted audio.
Quality Assessment:
- Test multiple extension combinations
- Compare internal vs. external call quality
- Check network performance for VoIP systems
- Evaluate cable quality and terminations
Improvement Strategies: For analog systems, check cable quality and terminations. For VoIP systems, verify network performance, adjust codec settings, and check for packet loss or jitter.
7. Programming Changes Don’t Take Effect
Symptoms: System accepts programming changes but features don’t work as configured.
Debugging Process:
- Verify programming method and access level
- Check for conflicting settings
- Review system memory and capacity
- Test programming with system restart
Resolution: Many systems require specific programming sequences or system restarts to implement changes. Follow manufacturer procedures exactly and verify changes with system status commands.
When Professional Installation Is Worth The Cost
Professional Installation Makes Sense When:
- Complex integration requirements (CRM systems, call recording, etc.)
- Multi-floor or challenging wiring situations
- Regulatory compliance requirements
- Mission-critical applications where downtime isn’t acceptable
- Warranty and support requirements justify the premium
Hidden Professional Installation Value:
- Warranty coverage for both equipment and labor
- Ongoing support and maintenance options
- Professional-grade testing and documentation
- Code compliance and permit handling
- Performance optimization and system tuning
Hybrid Approach: Best of Both Worlds
Many successful installations use a hybrid approach:
- DIY equipment selection and purchasing for cost savings
- Professional installation for complex wiring or integration
- DIY programming and maintenance for ongoing flexibility
- Professional consultation for design and troubleshooting
This approach can save 30-50% compared to full professional installation while ensuring critical elements are handled correctly.
Advanced Configurations and Integration
Once you’ve mastered basic installation, these advanced features separate amateur installations from professional-grade systems.
VoIP Integration and Hybrid Systems
SIP Trunk Configuration Session Initiation Protocol (SIP) trunks offer significant cost savings and flexibility:
- Configure SIP server settings provided by your VoIP carrier
- Set up authentication credentials and registration parameters
- Program codec preferences for optimal call quality
- Configure failover and redundancy options
Quality of Service (QoS) Configuration VoIP calls require network priority to maintain quality:
- Configure router QoS settings to prioritize voice traffic
- Set up VLAN configurations for voice network isolation
- Monitor network performance and adjust settings as needed
- Implement bandwidth management for peak usage periods
Hybrid System Benefits Combining traditional phone lines with VoIP provides:
- Cost savings on long-distance calls through VoIP
- Reliability backup through traditional phone lines
- Emergency calling reliability (911 services)
- Flexibility to choose best carrier for each call type
Call Recording and Monitoring
Legal Compliance Considerations Call recording requires careful attention to legal requirements:
- Verify local and federal regulations for call recording
- Implement proper consent and notification procedures
- Secure storage and access controls for recorded calls
- Retention policies and automatic deletion capabilities
Technical Implementation Modern PABX systems offer sophisticated recording options:
- Selective recording based on extension or call type
- Integration with storage systems and databases
- Search and retrieval capabilities
- Quality monitoring and analysis tools
Mobile Integration and Remote Access
Mobile App Integration Connect your PABX system with mobile devices:
- Softphone applications for extension mobility
- Mobile device integration for seamless indoor/outdoor calling
- Remote system administration and monitoring
- Mobile access to voicemail and system features
Remote Worker Support Enable remote workers to access full PABX features:
- VPN connectivity for secure remote access
- Home office integration with main system
- Mobile device provisioning and management
- Quality monitoring for remote connections
System Monitoring and Maintenance
Proactive Monitoring Setup Implement monitoring that prevents problems before they occur:
- System health monitoring and alerting
- Call quality measurement and reporting
- Capacity utilization tracking
- Security monitoring and intrusion detection
Preventive Maintenance Procedures Regular maintenance prevents system failures:
- Backup procedures for system programming and data
- Firmware update procedures and testing
- Physical maintenance of equipment and connections
- Performance optimization and system tuning
Security Considerations and Best Practices
PABX systems are increasingly targeted by cybercriminals. Proper security implementation is essential for any installation.
Network Security Implementation
Firewall Configuration Proper firewall setup protects against unauthorized access:
- Configure specific ports for PABX system access
- Implement IP restrictions for administrative access
- Monitor and log all system access attempts
- Regular security updates and patch management
Access Control and Authentication Implement strong access controls:
- Strong passwords for all system accounts
- Multi-factor authentication where available
- Regular password changes and account audits
- Separate administrative and user access levels
Toll Fraud Prevention
Common Fraud Scenarios Understanding fraud methods helps prevent them:
- Unauthorized access to outbound calling features
- Exploitation of voicemail systems for long-distance access
- Conference calling abuse for international calling
- After-hours system access and abuse
Prevention Strategies Implement multiple layers of fraud prevention:
- Outbound calling restrictions based on time and extension
- International calling blocks and monitoring
- Call duration limits and unusual usage alerts
- Regular review of call logs and billing statements
Physical Security
Equipment Protection Physical security is often overlooked:
- Secure main unit location with access controls
- Cable protection and tamper detection
- Environmental monitoring and protection
- Backup power and disaster recovery planning
When to Call Professionals: Recognition Points
Even experienced DIY installers encounter situations that require professional intervention. Recognizing these situations early prevents costly mistakes and system failures.
Technical Complexity Indicators
System Integration Requirements Professional help is recommended for:
- Integration with existing business systems (CRM, databases)
- Multi-site installations with site-to-site connectivity
- Complex call routing and automated attendant programming
- Integration with legacy systems or specialized equipment
Regulatory Compliance Needs Certain installations require professional certification:
- Healthcare installations requiring HIPAA compliance
- Financial services installations with regulatory requirements
- Government or defense contractor installations
- Any installation requiring formal compliance documentation
Installation Complexity Factors
Physical Installation Challenges Professional installation makes sense for:
- Multi-story installations requiring complex cable routing
- Installations in historic buildings with wiring restrictions
- Integration with building security and access control systems
- Installations requiring electrical permits or code compliance
Timeline and Business Continuity Professional installation may be necessary when:
- Business operations cannot tolerate extended installation periods
- Cutover from existing systems must be seamless
- Installation must coordinate with other construction or renovation
- System must be operational by specific business deadlines
Ongoing Support Considerations
Long-term System Management Consider professional support for:
- Systems requiring 24/7 monitoring and support
- Regular system updates and maintenance requirements
- Staff training and ongoing user support needs
- Performance optimization and capacity planning
Vendor Relationships Professional installation often provides:
- Direct vendor support relationships
- Warranty coverage for complete system integration
- Priority support for business-critical applications
- Access to advanced training and certification programs
Building Communication Systems That Last
PABX installation isn’t just about connecting phones—it’s about building communication infrastructure that grows with your needs and delivers reliable performance for years.
The DIY approach works exceptionally well for straightforward installations where you have the time to learn and implement systematically. You’ll save significant money and gain intimate knowledge of your system that pays dividends in ongoing maintenance and optimization.
But DIY isn’t always the answer. Complex integrations, tight timelines, and mission-critical applications often justify professional installation costs through reduced risk and faster deployment.
Key Success Factors
Regardless of your installation approach, focus on these critical elements:
Planning Thoroughness Every successful installation starts with comprehensive planning. Invest time upfront to understand requirements, map out wiring routes, and select compatible equipment. This planning phase determines installation success more than any other factor.
Quality Components Your PABX system is only as reliable as its weakest component. Invest in quality equipment from established manufacturers like those available through Telecare System’s professional-grade product lines. The incremental cost of quality components pays for itself through reduced maintenance and longer system life.
Documentation and Testing Professional installations always include thorough documentation and testing procedures. Apply the same standards to DIY projects—document wiring, settings, and configurations. Test every feature before considering the installation complete.
Future-Proofing Considerations Technology evolves rapidly. Build flexibility into your installation that accommodates future changes without complete system replacement. This means oversizing capacity, planning for network integration, and selecting systems with upgrade paths.
Your Next Steps
Ready to start your PABX installation project? Here’s your action plan:
- Complete the site assessment using the checklists in this guide
- Create your equipment compatibility matrix before making any purchases
- Plan your installation timeline with realistic expectations for each phase
- Gather the right tools and materials to avoid project delays
- Start with a small pilot installation to validate your approach
Remember that Telecare System offers comprehensive support throughout your installation journey—from equipment selection and compatibility verification to technical support and troubleshooting assistance. Whether you choose DIY installation or professional deployment, the right equipment foundation ensures long-term success.
The communication system you build today will serve your organization for years to come. Invest the time to do it right, and you’ll have a reliable, feature-rich system that grows with your needs while delivering the professional communication capabilities that drive business success.
Ready to get started?Contact with us our PABX Installation Planning Worksheet and Equipment Compatibility Guide to begin your project with confidence. Professional-grade results are achievable with the right approach, quality components, and systematic execution.
For technical support during your installation or equipment selection assistance, contact Telecare System‘s technical support team. Our certified technicians provide guidance throughout your project to ensure optimal results.